Queen's Domain Walkthrough & Progression Route
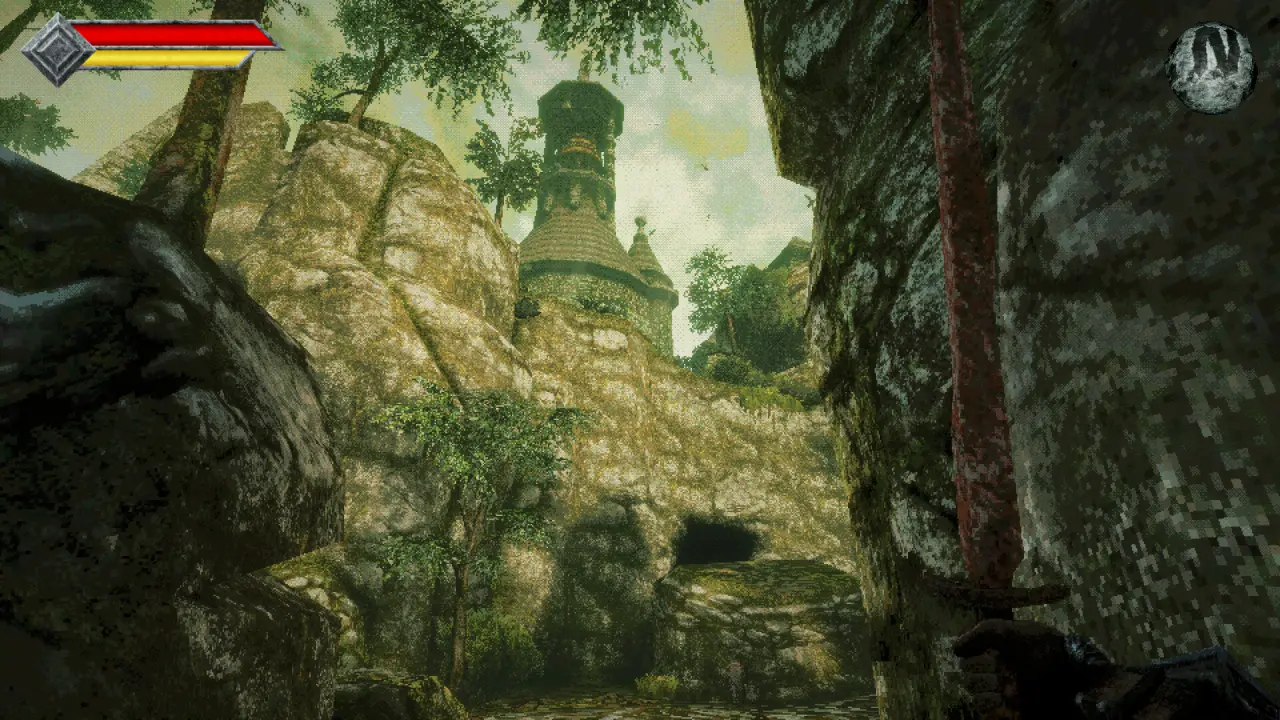
Quick Answer
The main route through Queen's Domain runs: Isle of Neasied opening area → Shrine of Endu (Holy Sword Endu) → the western broken bridge → Obmuer Temple → Tower of Knowledge → Deimpo Mausoleum → Ancient World → Siraatsu Castle. Progression is gated by Endu's Wind Dash upgrades, keys, and tools rather than levels, so whenever you're stuck the answer is almost always a missing Wind Gem, key item, or beacon — not grinding. After Deimpo Mausoleum the game stops being a corridor and lets you tackle Rotting Cavern, Verdant Hollow, the Forgotten Dungeon, and the Record of Sin in a looser order before the castle.
How Progression Works in Queen's Domain
Queen's Domain is an interconnected first-person action RPG with no in-game map and no quest log. Instead of a linear level list, the Isle of Neasied is a looping world where you repeatedly leave the starting area, return to it, and find that every new ability opens a gate you walked past earlier. Three things gate almost all forward progress:
- Holy Sword Endu and its Wind Gems. Endu is both a weapon and your traversal tool — its Wind Dash carries you across gaps and up to platforms. You collect five Wind Gems across the game, and each adds one more mid-air dash. Some gaps (the western broken bridge needs two dashes, the large pit inside Obmuer Temple needs three, the final approach to Queen Siraatsu needs five) simply cannot be crossed with fewer. The dash stays available even when another weapon is equipped, so you can fight with the Club and still fly.
- Key items and tools. Four Triangular Slates open Obmuer Temple, the Forbidden Archives Key opens the Tower of Knowledge's golden doors, the Acid Vial dissolves the fleshy walls that block the way to Deimpo Mausoleum, and a blue key plus shock gun from an Ancient World lab powers the pyramid towers that extend the bridge to Siraatsu Castle.
- The three Gargoyle beacons. The Tower of Knowledge stays sealed until you light three outdoor gargoyle beacons with the Azure Torch. Two are reachable early; the third only unlocks after Dagoom dies in Obmuer Temple.
A practical trick for telling whether you've reached an area too early: defeat an enemy and check where its entry appears in the Bestiary. Entries are numbered roughly in progression order, so an enemy sitting dozens of entries beyond anything you've seen is a sign the region is meant for later.
The Area-by-Area Route
1. Isle of Neasied (Opening Area)
Talk to Commander Ekonta at the campfire for the Rusted Sword, then grab the Dagger Belt near the shipwreck — throwing weapons make the early game far more manageable. Loop around the beach to the Crypt, hit the switch near its entrance to get inside, and take the Endu Shrine Gate Key from the central tomb hall. The Wooden Club in the Crypt is worth picking up: skeletons, including the first boss, are weak to Impact damage.
Beat the Shrine Guardian at the Shrine of Endu to claim the Holy Sword Endu and its first Wind Gem. From there, dash east toward the Tower of Knowledge approach and take the Azure Torch from the gargoyle statue, then climb the rocks between the pillars to fly to the second Wind Gem. Light the first gargoyle beacon up the broken stairway and the second north of the elevator.
Note the sealed Deimpo Mausoleum near the starting camp — you can see it from the very start, but it is not your next destination for several dungeons yet.
2. Obmuer Temple (First Major Dungeon)
With two Wind Dashes, double-dash across the western broken bridge to the flooded ruins. Collect the four Triangular Slates scattered around the waterways (skeletons respawn around the towers here, so fight them in open ground) and insert them at the sealed temple entrance.
Inside Obmuer Temple your objectives are: the third Wind Gem, two Trident Key locks on the main route (the other Trident Keys are optional and not needed for the boss), the three Royal Orbewa Guard minibosses — Yepo, Erda, and Wami — and finally Dagoom the Sea King. Dagoom is the first real difficulty spike in the game; see the bosses guide for the full strategy, but the short version is fire damage from the Azure Torch, hits to the backs of his legs to knock him down, and the Splash Hammer's special to clear his summoned fish.
After Dagoom, follow the exit route to light the third and final island gargoyle beacon, then use the nearby fast-travel connection back toward the opening region.
3. Tower of Knowledge
With all three beacons lit, the Tower of Knowledge opens. Inside: the numbered gargoyle statue puzzle (these numbered statues are separate from the three island beacons — the solution is on the puzzles page), the Storm Gem, the rotating staircase, and the NPC Budaen, who gives you the Forbidden Archives Key. Your target is the Necronomicon behind the Archives' golden doors at the top of the tower.
The Necronomicon fight rewards the Acid Vial, which coats your throwing daggers so they can destroy the moaning faces in fleshy walls — and you need that ability to leave the arena and to open the route to the next area.
4. Deimpo Mausoleum
Return to the blockage near Budaen and clear it with Acid Vial-coated daggers. This is the answer to the single most-asked "where do I go" question in the game: the Deimpo Mausoleum is the huge sealed building you could see from the starting camp, and it only opens from the Tower side.
Inside, the progression obstacles are moving stone pillars, Puwema's Lens, and the Mask of Second Sight. The boss door near Chef Gagi's section is sealed by six green Puwema sigils — equip the Mask of Second Sight and follow the green particle trails to dispel all six. Chef Gagi's meal-ticket side quest does not affect the door.
The Mausoleum boss is Poenir and Duenir, a dual fight: a giant bat in the air and a ground-based attacker. The fourth Wind Gem is hidden in this dungeon, so collect it while exploring. Afterwards, speak with King Gius Abraon, recover Unok's Remains, and continue through the passage beyond the King's location.
5. Where to Go After the Mausoleum: The Ancient World
After defeating Poenir and Duenir, the game stops being a corridor. The critical-path step is simple: take the fissure past King Gius Abraon into the Ancient World, the machine-filled region. There you find a research lab with a blue key and a shock gun, then use the gun on the three pyramid power towers; the last tower holds its own boss, the Ancient Besom Cutter. Powering all three opens the large metal bridge to Siraatsu Castle. Josami Lord Saijha guards the Ancient World route and is widely considered one of the best fights in the game.
Around this point several optional regions become worth clearing, and community reporting suggests players reach them in different orders:
- Rotting Cavern — wade through the rotting lake water to bait the Gigantic Serf, a giant fish that drops one of the three Jigeki Key parts.
- Verdant Hollow — home of the Temple of Puwema and the optional dragon pair Usunha and Wujomiod, behind the eight-torch door that needs the Mask of Second Sight and all eight Sipeha statues. This is also the route tied to forging the True Holy Sword Akunra.
- Record of Sin — its boss, the Herald of Okbujo, hands over the Memento Mirror after the fight, which is required for the late-game endings.
- Forgotten Dungeon — the prison area, with Black Skeletal Witch Husipo, the Black Skeletal Butcher, and the Blood Angel Lords behind a big red door that needs the Blood Angel Josami Key from the blood ritual gauntlet in the ruins between Verdant Hollow and the Rotting Cavern.
- Petrified Garden — an optional region whose boss, Lost King Ojjama, drops the fifth and final coloured Trident Key; the garden also wakes up for the silver skull ritual tied to the last ending.
Details on every one of these encounters, in the order most players reach them, are on the bosses hub.
6. Siraatsu Castle and Queen Siraatsu
The castle needs three boss fights cleared — the Castle Lords Duke Obetda and Duchess Ubhaer, plus the Dekanima Ritual of Blood and the High Spec Automatons encounters among the castle's sealed wings — with each victory lighting part of the sealed foyer door that blocks the way to Queen Siraatsu. The final approach includes one more Wind Dash crossing; five dashes are enough for it, so you do not need the True Holy Sword Akunra just to reach the throne room.
Reaching the Queen does not guarantee a good outcome: the sword you bring to the final fight decides which of the four endings you get. Fighting her with a normal weapon gives the failed ending, the True Holy Sword Akunra triggers the Enraged Queen Siraatsu phase, and Okbujo's Judgement leads to the Soul of Sipeha. The endings guide covers each route.
"Where Do I Go Next?" Troubleshooting
| Stuck point | What's actually blocking you |
|---|---|
| Can't cross the western broken bridge | You need two Wind Dashes. Find the second Wind Gem above the opening region before attempting it. |
| Obmuer Temple entrance won't open | Collect all four Triangular Slates from the flooded ruins and insert them at the sealed entrance. |
| Can't cross the large pit inside Obmuer Temple | It needs three Wind Dashes — the third Wind Gem is inside this temple. |
| Tower of Knowledge is sealed | Light all three island gargoyle beacons with the Azure Torch. The third is only reachable after defeating Dagoom. |
| Fleshy wall blocks the path after the Necronomicon | Coat your throwing daggers with the Acid Vial the Necronomicon dropped and shoot the moaning faces. |
| Mausoleum boss door won't open | Dispelling all six green Puwema sigils with the Mask of Second Sight is what opens it — not the Chef Gagi quest. |
| After the Mausoleum, no clear path | Speak to King Gius Abraon, take Unok's Remains, and continue through the fissure past his position to the Ancient World. |
| Bridge to Siraatsu Castle isn't out | Power all three pyramid towers in the Ancient World using the shock gun from the lab; the last tower's boss is the Ancient Besom Cutter. |
| Castle foyer door sealed | Clear the remaining castle boss fights — each one lights part of the door. |
| Can't make the final gap before the Queen | You need five Wind Dashes. Backtrack for the remaining Wind Gems. |
| Enemies suddenly far too strong | Check the Bestiary: if their entry numbers sit far beyond everything you've fought, you've found a later region early. Go explore a different route. |
One general rule from the community: prioritise an unfamiliar path that has a visible unlock requirement (a keyhole, a beacon, a sealed door) over one that simply contains overpowered enemies. Grinding levels rarely compensates for a missing movement upgrade or key item.
Frequently Asked Questions
What order should I do the areas in Queen's Domain?
Shrine of Endu first (for Holy Sword Endu), then Obmuer Temple, Tower of Knowledge, Deimpo Mausoleum, and the Ancient World, in that order — the first half of the game is effectively fixed. After the Mausoleum, Rotting Cavern, Verdant Hollow, the Forgotten Dungeon, the Record of Sin, and the Petrified Garden are optional and can be tackled in most orders before finishing Siraatsu Castle.
Where do I go after the Deimpo Mausoleum boss?
Speak with King Gius Abraon, recover Unok's Remains, and continue through the passage beyond him — it leads through a fissure into the Ancient World. From there, find the lab's blue key and shock gun, power the three pyramid towers, and cross the newly extended bridge toward Siraatsu Castle.
Is Queen's Domain progression linear or open?
The first four dungeons (Shrine, Obmuer Temple, Tower of Knowledge, Mausoleum) run in a fixed sequence gated by Wind Gems, slates, beacons, and the Acid Vial. After the Mausoleum the world opens up and most remaining regions are optional — the castle bridge quest is the only hard requirement to reach the final boss.
Do I need all the Trident Keys to finish the game?
No. Only two Trident Keys are required inside Obmuer Temple for the main route to Dagoom. The remaining coloured Trident Keys, including the Onyx Trident Key from Lost King Ojjama in the Petrified Garden, open optional side areas and hidden rooms such as the White Tree Guardian chamber.
Can I reach areas too early in Queen's Domain?
Yes — the island lets you stumble into much later regions before the main route points you there. If enemies seem disproportionately strong, check where their Bestiary entries fall; a big numbering gap means you have probably arrived early and should explore elsewhere.
How many Wind Dashes do I need to finish the game?
Five Wind Dashes are enough for the final approach to Queen Siraatsu, which is the hardest movement check on the critical path. You do not need the True Holy Sword Akunra (which grants ten) purely for traversal — that sword matters for the endings, not for reaching the throne room.
Sources
- Queen's Domain bosses: every boss in order with locations, rewards and strategyoutputlag.com
- Queen's Domain Progression Route: Where to Go Next and in What Order (Start to Mausoleum)outputlag.com
- How Do You Start and Progress in Queen's Domain?whisperofthehouse.com
- Where Should You Go Next in Queen's Domain?whisperofthehouse.com
- Queen's Domain Obmuer Temple Walkthrough — TechRaptortechraptor.net
- Queen's Domain Tower of Knowledge Walkthrough — TechRaptortechraptor.net
- Walkthrough and Guide for Queen's Domain on PC — Apocanowapocanow.com
- Queen's Domain Isle of Neasied Walkthrough — Whisper of the Housewhisperofthehouse.com
Related Guides
- Map & Areashow every area connects when there's no in-game map
- Bosses Guideall 29 bosses in order with strategies
- Puzzle Solutionsthe gargoyle statue puzzle, sigils, trident keys and more
- Beginner's Guidemechanics the game never explains
- Endings Guideall four endings and how the final sword choice works