Queen's Domain Beginner Guide: 12 Things the Game Doesn't Tell You
Quick Answer
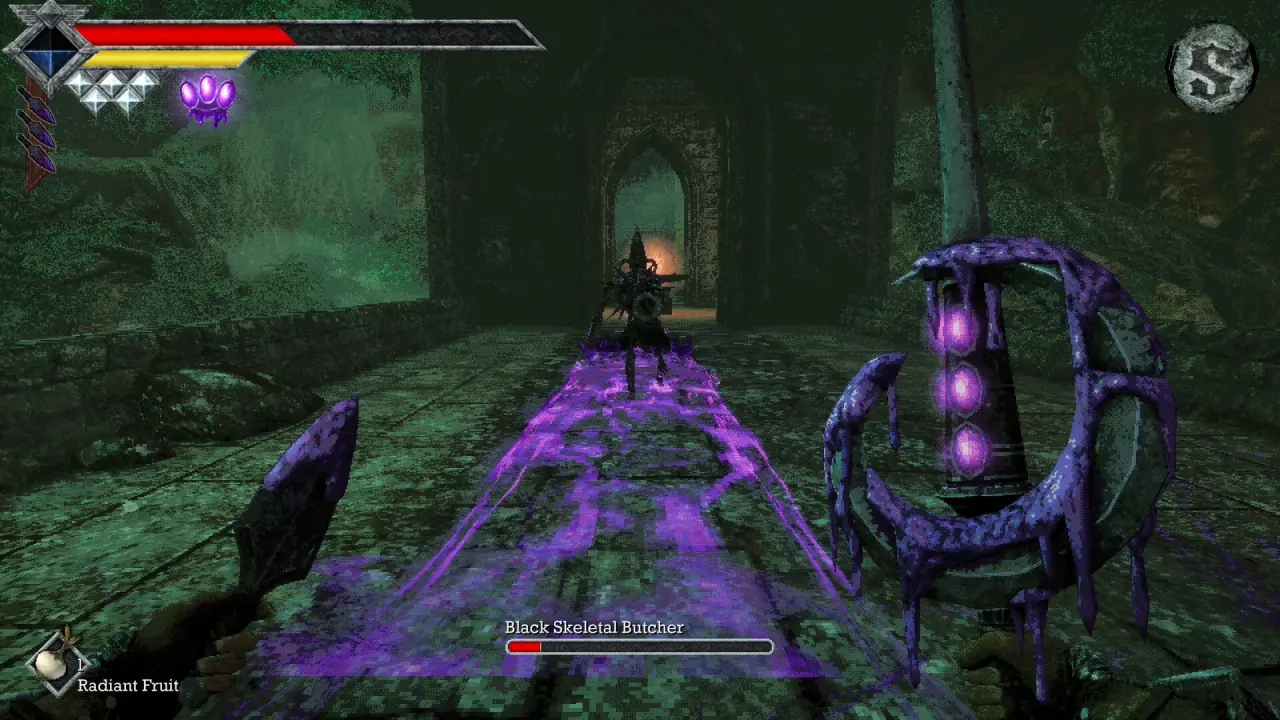
Queen's Domain explains almost nothing upfront: there is no map, no quest markers, no autosave, and your damage depends on a yellow Power Meter that most players spam empty without noticing. The twelve tips below cover the hidden rules — saving vs. resting, weapon leveling, throwing weapon cooldowns, Endu's air dash, and permanent food buffs — that separate a smooth first run from a frustrating one.
Queen's Domain is a deliberately old-school game. Freshly Baked Games built it in the spirit of King's Field: you wash up on the Isle of Neasied with nothing, the game hands you a rusted sword, and from there you are on your own. There is no tutorial beyond a guidebook that fills in as you play, no map, and no glowing objective markers. Nearly every question new players ask on Steam and r/Fieldies has the same answer: "the game expects you to figure it out."
That's the fun — but only if you know which rules exist in the first place. Here are the twelve things the game doesn't explain, in rough order of how early they'll matter to you.
1. Your Damage Depends on the Yellow Power Meter
The single most misunderstood mechanic in Queen's Domain is the Power Meter — the yellow bar under your health. Your weapon only deals full damage when the bar is full. One swing empties it, and swinging again before it refills does almost no damage, no matter how strong the weapon is.
The correct rhythm is: attack once with a full meter, back away while it recharges, then step in and attack again. Players who spam attacks take hundreds of hits to break a wooden crate that a patient player breaks in a few.
Two extra rules the game never states:
- Running drains the Power Meter. You can still run at zero, but the bar will not recharge until you stop.
- Wind Dashes also drain it, so chained dashes cost both mobility and damage until you let it refill.
For the full breakdown — charge attacks, weapon skills, and status effects — see the combat guide.
2. Charge Your Attacks for Big Damage
Hold the primary attack button and the Power Meter starts to fill with blue; release at full charge for maximum damage. You can even begin charging while the meter is still recharging.
The trade-off: while holding a charge you cannot run, Wind Dash, or throw weapons, so only charge when you have space — typically right after baiting an enemy's attack and stepping out of its range.
3. Resting Is Not Saving — and It Respawns Enemies
Crystal Monuments (the blue-crystal obelisks) offer two separate options that new players constantly confuse:
| Option | What it does | The catch |
|---|---|---|
| Save | Records your progress | None — save as often as you like |
| Rest | Fully restores health and removes debuffs | Respawns all enemies in the area |
There is no autosave and no checkpoints. If you die, you reload your last manual save — and lose everything since. Veteran players save after every key, weapon, or major pickup, and sometimes backtrack to an earlier monument just to bank progress. Enemies also respawn on their own after enough time, so "cleared" areas are never permanently safe (bosses stay dead).
4. There Is No Map — Navigate by Compass and Landmarks
Queen's Domain has no in-game map. All you get is the compass orb in the corner of the HUD and the island's landmarks. Build the habit early:
- Note visual landmarks (towers, large doors, the mausoleum's sealed front entrance) and mentally connect shortcuts back to them.
- The island is one interconnected space with "Skyrim exits" everywhere — finishing a dungeon usually unlocks a ramp, elevator, or drop-down back to an earlier area.
- If a ledge looks just out of reach, it almost certainly waits for a later Endu dash upgrade. Come back.
- When you're truly stuck, the game's own hint: the dead sometimes leave clues. Skeletons placed in odd poses are usually pointing at secrets.
If you want area-by-area directions instead, use the walkthrough.
5. Throwing Daggers Are Infinite — Use Them Constantly
The Dagger Belt (found on a small island off the starting beach) gives you Throwing Daggers that regenerate on a cooldown rather than running out of ammo. They cost no stamina, which makes them the perfect tool to:
- Pull a single enemy away from a group so you fight one at a time
- Snipe environmental hazards like the eye-like plants that zap you mid-fight
- Keep dealing damage while your Power Meter recharges
Later throwing weapons (homing knives, life-draining blades, poison dirks) follow the same cooldown model, and the community consensus is that investing in your throwing options early pays off more than almost any melee upgrade. The best weapons page ranks the throwing options worth keeping equipped.
6. Match Damage Types to Enemies — the Bestiary Tells You Which
Weapons deal Slash, Pierce, or Impact damage (some add elemental or "physical" types), and every enemy is weak to some and resistant to others. Skeletons fold to blunt Impact weapons; the ladybug-like Ratty Bugs shrug off spears but fall to Slash.
You can equip three melee weapons at once — a smart loadout covers all three damage types. After your first kill of any species, its bestiary entry unlocks its resistances and loot table, so checking the bestiary after every new enemy is one of the best habits you can build.
7. Weapons Level Up With Use — and Evolve at Level 10
Every weapon you swing gains experience and levels up (roughly a few percent more damage per level). Most cap at Level 10, and eight base weapons — the seven "Rusted" starter lines plus the Wooden Club — transform into entirely new, named weapons at Level 10: the starting Wooden Club becomes Puwema's Blessed Orb, whose special attack becomes a heal-over-time spell; the Rusted Spear becomes Jigeki's Serpent Thrust, which can poison.
Because weapon XP comes from your hits, it's usually better to stick with one weapon and level it than to constantly swap. The evolution system, including the Holy Sword Endu's two-stage reforging, is covered in detail in the best weapons guide.
8. The Holy Sword Endu Changes Everything — Get It Early
Endu is the game's signature sword, won by defeating the first boss (the Shrine Guardian) at the Endu Shrine. Its air dash works even when another weapon is equipped, and it turns Queen's Domain from a slow crawl into an exploration game: gaps you couldn't cross become jumpable, and previously invisible routes open up.
Wind Gems (five hidden across the island) each add one extra dash, and the Storm Gem unlocks an ultimate attack. Your movement before Endu is deliberately sluggish, so treat reaching the Shrine Guardian as your first real objective. If you're stuck on the route there, the walkthrough covers it step by step.
9. Food Gives Permanent Stat Buffs — Eat Everything You Find
Meals and food items you find are not temporary healing items: eating them permanently raises your stats. Broiled Meat permanently increases Attack Power; Roasted Poultry permanently increases maximum health. Character levels mainly extend your health pool, so food is one of the only ways to push offense and other stats upward.
Combined with accessories (three equippable at once — charms, necklaces, and amulets with bonuses like extra health or damage resistance), food is the character-building layer most players ignore. See the leveling guide for how stats, food, and accessories stack.
10. Shop and Currency: Save Ancient Coins for What Matters
After the first boss, you can unlock Umbada the Merchant (via the Stone Duck Figurine) at save obelisks. Ancient Coins — her only currency — are scattered in chests and dropped by enemies, and her stock improves as you progress and as your weapons evolve. Sell "Treasure" items to her for coins, but think before spending: extra throwing weapon charges and accessories tend to matter more than plain replacement weapons early on.
11. Expect Cheap Deaths — Mimics, Boulders, and Wells
Queen's Domain leans into one-hit deaths as a running joke. Chests can be mimics that kill you instantly, boulders fall in corridors, and jumping down a well before you have enough Endu dashes is instant death. The countermeasure is the same for all of them: save first. Never jump into any deep drop without a fresh save, and treat suspicious chests with one thrown dagger before opening them.
12. Your Loadout Is Six Slots — Plan It
You carry three melee weapons and three throwing weapons at once, plus three accessories. Since damage types, special attacks, and enemy resistances all interact, a deliberate loadout (e.g., one Slash, one Pierce, one Impact weapon) plus a utility throwing option covers far more situations than six "strongest" picks. Swapping is fast and free — use it mid-fight.
Common Early Mistakes to Avoid
- Spamming attacks with an empty Power Meter and concluding the game is too grindy. Slow down and charge.
- Treating Rest as a checkpoint. Rest is healing; Save is progress. They're separate buttons.
- Dumping hours into the sealed Deimpo Mausoleum front door near the starting camp. It does not open from the outside at the start — the intended entry comes later, from the Tower of Knowledge side.
- Hammering locked doors. Most need a key or an ability you haven't found. Move on and return.
- Skipping food and accessories, then wondering why damage never scales. Progression in Queen's Domain is levels plus meals plus gear — the leveling guide explains how they combine.
- Wandering into open areas with throwing weapons unequipped. Enemies attack from above and behind; daggers are your early warning system.
Frequently Asked Questions
Is Queen's Domain too hard for beginners?
The opening hours are genuinely punishing — no map, no autosave, and weak starting weapons. The difficulty evens out once you understand the Power Meter, unlock Endu, and start evolving weapons. The free demo on Steam is a good difficulty test before buying.
Does Queen's Domain have a map or quest markers?
No. Navigation is by compass and landmarks only. There is also no quest log or objective markers — clues come from NPCs, notes, and skeleton poses in the world.
Can you save anywhere in Queen's Domain?
You can only save at Crystal Monuments, but there are many of them and saving has no downside — save after every significant pickup. Resting at a monument is separate: it heals you but respawns enemies.
What happens when you die in Queen's Domain?
You reload your last manual save. There is no corpse run and no lost-souls recovery — anything done since the last save is gone.
What should I do first in Queen's Domain?
Talk to Commander Ekonta at the campfire for your first sword, grab the Dagger Belt on the small island off the beach, clear the Crypt for the Endu Shrine Gate Key, then beat the Shrine Guardian to claim the Holy Sword Endu.
Should I level one weapon or switch weapons a lot?
Stick with one or two weapons per damage type. Weapons gain XP from your hits, and several starter weapons evolve into much stronger forms at Level 10, so concentrated use pays off.
Sources
- Steam store pagestore.steampowered.com
- Queen's Domain Guide | Beginner Tips and Tricks — TechRaptortechraptor.net
- Queen's Domain Isle of Neasied Walkthrough — TechRaptortechraptor.net
- Queen’s Domain Releases Today! Some Beginner’s Pro Tips — Xbox Wirenews.xbox.com
- Queen's Domain Review — NoobFeednoobfeed.com
- Queen’s Domain Review: Pure Unforgiving Action RPG Magic — Gert Lush Gaminggertlushgaming.co.uk
- Tabletop Battles Reviews: Queen's Domaintabletopbattles.com
- Queen's Domain — Casual Game Guidescasualgameguides.com
- All Status Effects in Queen’s Domain explained — Destructoiddestructoid.com
- Queen's Domain Shop Guide — TechRaptortechraptor.net
Related Guides
- Walkthroughexact area order when you don't know where to go next
- Combat Guidestamina, charge attacks, and status effects in depth
- Best Weaponswhich weapons and evolutions are worth your XP
- Leveling Guidestats, food buffs, and how character progression works
- Map & Areasa text map of the Isle of Neasied's zones and connections
- Bossesboss order and strategies, starting with the Shrine Guardian